I have received a few requests for this Kim Kardashian hairstyle.
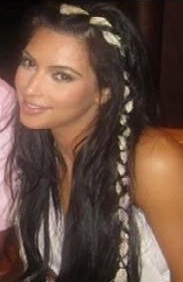
What you will need
Brush, comb
A long ribbon, scarf
Small hair elastic hair color, ribbon color, or clear
Hair clip
I have broken it down into 3 versions depending on what fits you and your style/abilities
1. The ribbon should be a couple inches longer than your hair when braided it will shrink once hairstyle is complete you can trim the ribbon. Create a part down the center of your head and fold ribbon in half to find its center. Place the center of the ribbon at the top part of your head as if it were a headband. Pin the Ribbon or scarf to the left side part and take a section of hair on the right side of your part from about the brow arch and back about a pinky length back. Split the hair in half laying the ribbon down the center and begin braiding using the ribbon as the third strand. Once you've reached the end tie off with a small elastic, trim away any extra ribbon length insuring not to cut the hair. Repeat the section on the left side insuring the section is exactly the same as the right. Repeat the braid on the right side. This is a boho look so don’t worry about the remaining hair looking perfect allows it to fall naturally.
If you struggle with the ribbon here is an alternative way to achieve this hairstyle.
2. The ribbon should be a few inches longer than your hair when braided it will shrink once hairstyle is complete you can trim the ribbon Create a part down the center of your head, take a section of hair on the right side of your part. From about the brow arch and back about a pinky length back and tie off with a small elastic to create a pony tail. Repeat the section on the left side insuring the section is exactly the same as the right. Fold ribbon in half to find its center. Place the center of the ribbon at the top part of your head as if it were a headband tie a knot around the left ponytail with the ribbon insuring that the ribbon across the head does not twist. Using the ribbon as one of the three strands braid the left ponytail and tie off at the end with elastic. Tie the ribbon around the right ponytail and repeat the braid on the right side. This is a boho look so don’t worry about the remaining hair looking perfect allows it to fall naturally.
3. This last version is for the more "princess" look perfect for Halloween just around the corner. A thicker ribbon or scarf is better for this style but a thin ribbon can be used. The scarf should be a couple inches longer than your hair when wrapped it will shrink a bit once hairstyle is complete. Create a part down the center of your head and fold scarf in half to find its center. Place the center of the scarf at the top part of your head as if it were a headband. Tie the right side of the scarf to your hair with an elastic, On the left side part and take a section of hair on the right side of your part from about the brow arch and back about a pinky length back. Split the hair in half laying the scarf down the center wrap the front section back around the scarf and bringing it back around to the front. at this point cross your hair over the scarf forming an X bring it behind the scarf and for another X. continue this all the way down to the ends and tie off with an elastic. Releasing hair on the right side Repeat what you just did with the left. Now at this point you can leave down or if you want a softer more out of the way princess look bring the scarf ends together gently in the back and tie off bobby pinning in place where you want the ribbon to rest along your head for a softer lower draping or a tighter higher look.


