What you will need
Polish
primer and top coat
orange
black
silver with glitter
white
red
green
Tooth picks or nail art tool
Between each color/coat allow to dry completely
Apply a primer coat to every nail. Alternate white and silver polish throughout your nails. Taking your toothpick or tool draw small lines of white over the silver polish branch white lines from it and again from the branches maid to create snow flakes add as few or as many as you would like as large or small as you like, you can also add single white dots throughout. Taking your black polish draw a line over your white polish tip to create the snow mans hat and fill in. draw two black dots for eyes and a dotted smile for the mouth. Take your orange polish and make a dot for the nose if you like gently pull it to the side to create a point for the carrot. Taking the silver polish and tooth pick/tool draw a line at the base of the hat across your nail. Add a few green and red dots atop a corner of your silver line for mistletoe. Apply a top coat and your finished
Make it your have fun and enjoy
Showing posts with label how to. Show all posts
Showing posts with label how to. Show all posts
Wednesday, November 9, 2011

Autumn nails
What you'll need
nail polish
primer coat and top polish
gold
orange
dark auburn or dark reddish brown
almost transparent or multiple coat gold
Thick solid gold
black
copper
Tooth pick or nail styling tool
Leaves rub on (if you want to cheat)
rhinestones and glue (optional)
Tape (optional)
Between each color allow the polish to dry I will not tell you to do so throughout the tutorial.
Apply primer coat to nails and let dry. Apply the orange polish half way up your nail (if trimmed or desired width if your nails are longer) from the tip and as if you were making a side triangle fill in the corner of your nail with the orange polish. (Tape can be used for a cleaner line) Taking your dark auburn polish repeat what you created with the orange filling in the orange half way with the auburn to create a line of orange and the corner with auburn. Taking your solid gold polish draw a thin line through the auburn at the same angle you have been polishing. Taking your gold transparent polish apply one coat similar to the direction and style of the other two colors from the thick gold line and just above the orange. This will create a beautiful multicolor fall look. Now depending on your skill level on the remaining primer coat part of your nail you can apply the rub on leaves or autumn decorative, paint a vibrant color leaves with a small tooth pick, add rhinestones, or just apply a top coat and leave as is. OPTIONAL: instead of polishing one side of your nail you can overlap and cross the colors on either side when you feel ready....Make it yours enjoy

nail polish
primer coat and top polish
gold
orange
dark auburn or dark reddish brown
almost transparent or multiple coat gold
 |
| this is the style not the actual look |
black
copper
Tooth pick or nail styling tool
Leaves rub on (if you want to cheat)
rhinestones and glue (optional)
Tape (optional)
Between each color allow the polish to dry I will not tell you to do so throughout the tutorial.
Apply primer coat to nails and let dry. Apply the orange polish half way up your nail (if trimmed or desired width if your nails are longer) from the tip and as if you were making a side triangle fill in the corner of your nail with the orange polish. (Tape can be used for a cleaner line) Taking your dark auburn polish repeat what you created with the orange filling in the orange half way with the auburn to create a line of orange and the corner with auburn. Taking your solid gold polish draw a thin line through the auburn at the same angle you have been polishing. Taking your gold transparent polish apply one coat similar to the direction and style of the other two colors from the thick gold line and just above the orange. This will create a beautiful multicolor fall look. Now depending on your skill level on the remaining primer coat part of your nail you can apply the rub on leaves or autumn decorative, paint a vibrant color leaves with a small tooth pick, add rhinestones, or just apply a top coat and leave as is. OPTIONAL: instead of polishing one side of your nail you can overlap and cross the colors on either side when you feel ready....Make it yours enjoy
Nails worth reading about
What you'll need
white nail polish
top coat
New paper
Rubbing Alcohol
Paint your nails with white nail polish, depending on the polish you may need a few coats. Allow polish to dry completely. Taking your rubbing alcohol fill a shot like glass whether it be a shot glass or a lid something deep enough your nail can sit in untouched. let your nail sit in the alcohol for about 5 seconds. Press without rubbing or smudging a piece of newspaper against your alcohol finger nail for 15 seconds and remove. Allow it to dry and apply a top coat. Taking polish remover clean up your skin around your nail and your finished. Make it your own buy an old book and use desired words like love, live,joy etc for a more personalized touch. Use a pale color polish instead of white,small illustrations can be fun. Make it yours have fun with it.


white nail polish
top coat
New paper
Rubbing Alcohol
Paint your nails with white nail polish, depending on the polish you may need a few coats. Allow polish to dry completely. Taking your rubbing alcohol fill a shot like glass whether it be a shot glass or a lid something deep enough your nail can sit in untouched. let your nail sit in the alcohol for about 5 seconds. Press without rubbing or smudging a piece of newspaper against your alcohol finger nail for 15 seconds and remove. Allow it to dry and apply a top coat. Taking polish remover clean up your skin around your nail and your finished. Make it your own buy an old book and use desired words like love, live,joy etc for a more personalized touch. Use a pale color polish instead of white,small illustrations can be fun. Make it yours have fun with it.

Wednesday, October 26, 2011
A request

I have received a few requests for this Kim Kardashian hairstyle.
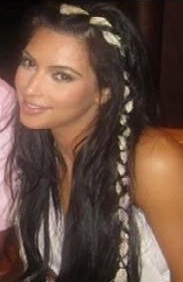
What you will need
Brush, comb
A long ribbon, scarf
Small hair elastic hair color, ribbon color, or clear
Hair clip
I have broken it down into 3 versions depending on what fits you and your style/abilities
1. The ribbon should be a couple inches longer than your hair when braided it will shrink once hairstyle is complete you can trim the ribbon. Create a part down the center of your head and fold ribbon in half to find its center. Place the center of the ribbon at the top part of your head as if it were a headband. Pin the Ribbon or scarf to the left side part and take a section of hair on the right side of your part from about the brow arch and back about a pinky length back. Split the hair in half laying the ribbon down the center and begin braiding using the ribbon as the third strand. Once you've reached the end tie off with a small elastic, trim away any extra ribbon length insuring not to cut the hair. Repeat the section on the left side insuring the section is exactly the same as the right. Repeat the braid on the right side. This is a boho look so don’t worry about the remaining hair looking perfect allows it to fall naturally.
2. The ribbon should be a few inches longer than your hair when braided it will shrink once hairstyle is complete you can trim the ribbon Create a part down the center of your head, take a section of hair on the right side of your part. From about the brow arch and back about a pinky length back and tie off with a small elastic to create a pony tail. Repeat the section on the left side insuring the section is exactly the same as the right. Fold ribbon in half to find its center. Place the center of the ribbon at the top part of your head as if it were a headband tie a knot around the left ponytail with the ribbon insuring that the ribbon across the head does not twist. Using the ribbon as one of the three strands braid the left ponytail and tie off at the end with elastic. Tie the ribbon around the right ponytail and repeat the braid on the right side. This is a boho look so don’t worry about the remaining hair looking perfect allows it to fall naturally.
3. This last version is for the more "princess" look perfect for Halloween just around the corner. A thicker ribbon or scarf is better for this style but a thin ribbon can be used. The scarf should be a couple inches longer than your hair when wrapped it will shrink a bit once hairstyle is complete. Create a part down the center of your head and fold scarf in half to find its center. Place the center of the scarf at the top part of your head as if it were a headband. Tie the right side of the scarf to your hair with an elastic, On the left side part and take a section of hair on the right side of your part from about the brow arch and back about a pinky length back. Split the hair in half laying the scarf down the center wrap the front section back around the scarf and bringing it back around to the front. at this point cross your hair over the scarf forming an X bring it behind the scarf and for another X. continue this all the way down to the ends and tie off with an elastic. Releasing hair on the right side Repeat what you just did with the left. Now at this point you can leave down or if you want a softer more out of the way princess look bring the scarf ends together gently in the back and tie off bobby pinning in place where you want the ribbon to rest along your head for a softer lower draping or a tighter higher look.
Friday, October 7, 2011
French Braided basket weaved updo
What you'll need
Gel/moose/hairspray
bobbypin
brush/comb/rat tail comb
hair elastics
hair decoration(optional)
hair clip(to clip hair out of the way)
 Brush hair throughout and apply desired texture product. Create a part at the crown of your head from ear to ear. Brush the back section into a pony tail at the crown and leave it for later. Part the front section on desired side just above the eyebrow arch. Taking a small section from your hairline at the top of the part hairspray section and begin your weave taking the rat tail comb at the top of your part, In equal sections go over/under over/under until you've reached the part. Pin the weaved section of the hairline ends at the top of the ponytail. Taking the rat tail comb reverse the basket weave pull the top sections of the basket weave over and clip out of the way taking a small section at the hair line spray with hairspray and pull it back over the ends you went under just before and pin at the pony tail elastic. Release the hair you clipped out of the way you should now have two basket weaved sections. Taking a rat tailed comb (at equal width with other two) weave reversing the previous section(where you went over go under where you went under go over) Clip the over sections up out of the way, pull a small section at hair line over where you went under just before hair spray and pin to hair elastic. Release clipped hair creating a third basket weaved section. Continue this until you reach the end of the part behind the ear. Basket weave braid the woven ends (if you don't know how i explain it in my basket weave braid blog) pin at the nape of your neck if hair is longer then the nape create a spiral with remaining ends and pin in place. Repeat the basket weave,braid and spiral on the other side. Take the top three ends you pinned at the elastic and braid add the next pinned ends into a french braid when you run out of ends incorporate the hair from the pony tail in small sections so that your still adding hair just above the pony tail ends. Pull up at the base of the braid this should flare the braid out beautifully and pin just above the ponytail. Curl the ends of the braid under and pin against the nape of your neck.


Gel/moose/hairspray
bobbypin
brush/comb/rat tail comb
hair elastics
hair decoration(optional)
hair clip(to clip hair out of the way)
Thursday, October 6, 2011
Fish Scale French Braid
What you'll need
small clear or hair colored elastics
Moose/hairspray
Brush/comb
Brush through hair and texture with desired products to eliminate fly aways and insure hair looks as desired. Create a V section at the top of your head, set aside for later. At the outer part of your eyebrow arch slide your finger up through your hair at an angle to the center part on each side and french braid to the crown. French braid the center section to the crown of your head, taking a small section from the left braided section ends incorporate into the center french braid. Taking a small section from the right braided section ends incorporate into the center french braid. Repeat this until you run out of the outer braided ends. Taking a small section just under the outer braids along the hairline incorporate it into the french braid. Continue this taking only small sections from along your hairline and bringing them over the remaining hair and incorporating it into the french braid. Once you've collected the last sections at the nape of your neck finish braid to the ends. Hair spray finished hair and your finished.


small clear or hair colored elastics
Moose/hairspray
Brush/comb
Brush through hair and texture with desired products to eliminate fly aways and insure hair looks as desired. Create a V section at the top of your head, set aside for later. At the outer part of your eyebrow arch slide your finger up through your hair at an angle to the center part on each side and french braid to the crown. French braid the center section to the crown of your head, taking a small section from the left braided section ends incorporate into the center french braid. Taking a small section from the right braided section ends incorporate into the center french braid. Repeat this until you run out of the outer braided ends. Taking a small section just under the outer braids along the hairline incorporate it into the french braid. Continue this taking only small sections from along your hairline and bringing them over the remaining hair and incorporating it into the french braid. Once you've collected the last sections at the nape of your neck finish braid to the ends. Hair spray finished hair and your finished.
Wednesday, October 5, 2011
Roll updo
What you'll need
bobby pins
hairspray/moose
brush/comb
 Brush hair to remove snarls and apply texture products throughout. Create your desired width and pin headband out of the way. Back comb entire remaining hair, with your hand push down back combed hair and pin in place just behind the ear. Pin another pin from the center of the last and continue this until you reach the center of your head. Starting at the other ear pin going the other direction repeat the pinning process going the other direction and cross center pins for a secure hold. Separate hair at the center and create two rolls by gently wrapping into a tube like shape and roll upwards and pin to your head covering the row of bobbypins. Repeat rolling the other side. Release headband section and create desired part, twist each side back and to the ends. Pulling at the twisted hair releasing curl like sections through out drape over the rolls you just created and pin in place.

bobby pins
hairspray/moose
brush/comb
Published with Blogger-droid v1.7.4
Knot updo/half updo
What you will need
Bobbypin
Hairspray/Gel/Moose
Brush/Comb
Hair elastic
Taking the top fourth of your hair split top section into thirds. Drop center section, tie the two outer sections into a knot(knotted ends should be in the top/bottom part of the knot). Gently back comb slightly the top end of the knot to insure hold and stability and bobby[in place. Taking the next fourth of your hair split section into thirds. Drop center section, tie the two outer sections into a knot(this knot's ends should be on the left/right side of the knot)over the first knot ends bobby pin in place. Now you can either leave as is as a half up half down updo or continue to tie the second section until you have a good inch of hair left. wrap around remaining hair until you reach the ends combined behind the hair back comb to secure hold and pin in place. For a more dramatic look back comb remaining hair ends and smooth.

Bobbypin
Hairspray/Gel/Moose
Brush/Comb
Hair elastic
Taking the top fourth of your hair split top section into thirds. Drop center section, tie the two outer sections into a knot(knotted ends should be in the top/bottom part of the knot). Gently back comb slightly the top end of the knot to insure hold and stability and bobby[in place. Taking the next fourth of your hair split section into thirds. Drop center section, tie the two outer sections into a knot(this knot's ends should be on the left/right side of the knot)over the first knot ends bobby pin in place. Now you can either leave as is as a half up half down updo or continue to tie the second section until you have a good inch of hair left. wrap around remaining hair until you reach the ends combined behind the hair back comb to secure hold and pin in place. For a more dramatic look back comb remaining hair ends and smooth.
Have Long hair but miss the short bob hair look. Before you go to the salon try this runway inspired hairstyle
WARNING: THIS HAIR STYLE INVOLVES INTENSE BACKCOMBING
What you'll need
Brush/Comb/Bore Brush
Hairspray
Bobbypin
Moose if preferred
hair elastic, clip or ability to braid
Texture hair throughout, Brush hair and create a part on desired side of your head. Using the side of the part with the most hair section off desired width and clip off for later if you do not have a clip you can braid hair half way down to secure hold. Taking remaining hair in small sections and back comb to the point it stands straight up and spray to secure hold with hair spray. Back comb entire head(not including hair you set aside)


What you'll need
Brush/Comb/Bore Brush
Hairspray
Bobbypin
Moose if preferred
hair elastic, clip or ability to braid
Texture hair throughout, Brush hair and create a part on desired side of your head. Using the side of the part with the most hair section off desired width and clip off for later if you do not have a clip you can braid hair half way down to secure hold. Taking remaining hair in small sections and back comb to the point it stands straight up and spray to secure hold with hair spray. Back comb entire head(not including hair you set aside)

Stay with me I realize its a bit extreme. Starting on the small parted side gently roll hair under loosely. Pinning in place as you go. When you reach the end roll up the side of your face pinning in place. Release clipped or braided section and gently back comb bang area and spray for volume. Gently brush smooth and loosely and gently drape over roll along side your face and pin twisting slightly and pin in place. Create a swirl for added style pin and place and spray for hold.
Tuesday, October 4, 2011
French Braided bun
What you will need
bobbypins
brush/comb
gel/moose/hairspray(texture)
hair elastics small and large

Brush through hair and texture as desired, split hair into two vertically even ponytails. Taking a small section from the bottom of each ponytail wrap the hair around the elastics. Bunching wrapped hair against your head tie a small elastic securing the wrapped ends around the base of the ponytails and let your wrapped hair loose to cover second elastic. Once you have two wrapped ponytails begin french braiding top pony tail starting with a small section at the top adding hair from the top ponytail down and adding hair from the second ponytail until you've added all the hair. Pull at the braid throughout until you have a full loose braid and tie off. Spray hair thoroughly and once dried wrap loosely into a bun shape pinning the bun in place at desired bun width.


bobbypins
brush/comb
gel/moose/hairspray(texture)
hair elastics small and large

Brush through hair and texture as desired, split hair into two vertically even ponytails. Taking a small section from the bottom of each ponytail wrap the hair around the elastics. Bunching wrapped hair against your head tie a small elastic securing the wrapped ends around the base of the ponytails and let your wrapped hair loose to cover second elastic. Once you have two wrapped ponytails begin french braiding top pony tail starting with a small section at the top adding hair from the top ponytail down and adding hair from the second ponytail until you've added all the hair. Pull at the braid throughout until you have a full loose braid and tie off. Spray hair thoroughly and once dried wrap loosely into a bun shape pinning the bun in place at desired bun width.
3 flower updo (long hair prefered)
What you will need
bobbypins
hairspray
brush/comb/bore brush
gel/moose (texture)
hair elastics
babies breath,pearls, hair decorations(optional)
Hair extensions if needed or desired

Texture hair as desired and create a desired width headband section and tie off for later. Create 3 ponytails (pigtails and a center pony)at the nape of the neck. If more width is desired back comb ponytails and bore brush hair smooth. wrap ponytail one into a bun and pull apart and pin into desired rose shape. Continue this with all three ponytail spreading out each bun fluid lovely. Twist headband section at ear to the end and drape over the roses pinning in place. Or create a rope braid headband and twist section at ear to the end and drape over the roses pinning in place. Hair style is finished.
bobbypins
hairspray
brush/comb/bore brush
gel/moose (texture)
hair elastics
babies breath,pearls, hair decorations(optional)
Hair extensions if needed or desired
Texture hair as desired and create a desired width headband section and tie off for later. Create 3 ponytails (pigtails and a center pony)at the nape of the neck. If more width is desired back comb ponytails and bore brush hair smooth. wrap ponytail one into a bun and pull apart and pin into desired rose shape. Continue this with all three ponytail spreading out each bun fluid lovely. Twist headband section at ear to the end and drape over the roses pinning in place. Or create a rope braid headband and twist section at ear to the end and drape over the roses pinning in place. Hair style is finished.
Saturday, October 1, 2011
Beautiful braided bun
What you'll need
Small clear or hair colored elastics
Brush/comb
Gel/moose/hairspray (texture)
Bobbypins (optional)
Brush through hair removing all snarls and texture. Split hair into three sections( pigtails, center). Braid each section to the ends. Collecting all the braids wrap into a large loose bun and pin in place. Make it your own add flowers, babies breath,head band,hanky. Spread braids out over head, keep braids together, use alternate braids..its all up to you.
Small clear or hair colored elastics
Brush/comb
Gel/moose/hairspray (texture)
Bobbypins (optional)
Brush through hair removing all snarls and texture. Split hair into three sections( pigtails, center). Braid each section to the ends. Collecting all the braids wrap into a large loose bun and pin in place. Make it your own add flowers, babies breath,head band,hanky. Spread braids out over head, keep braids together, use alternate braids..its all up to you.
Half updo side flower
What you'll need
Brush/comb
Gel/moose/hairspray (texture)
Rat tail comb/chopstick/pen (parting tool) Small elastics clear, hair color
Bobbypins
Curling iron/curlers(optional)
Brush hair and apply texture. On the side you desire your flower, make two small sections just above your ear. Braid each section to create two small braids tie off each with small elastic. Just above braids start a head band rope braid. If you don't know how I have a how to blog. When you reach your ear split into three section and normal braid down to to end. Pull across the back of your head just behind your two small braids and pin in place. Wrap ends into a bun where you want your flower. Twisting your braids into a bun place over your wrapped ends. Create desired flower look and pin in place. As I always say make it your own, play around with the Braiding headband. Add decorative embellishments whatever speaks to you.

Tired of headband slipping or disrupting your hairstyle? I've got your hairstyle solution with my sexy corset lacing
What you'll need
Brush/comb
Gel/moose/hairspray (texture)
Long thin Ribbon of desired color
Rat tail comb/chopstick/pen (parting tool)
Small elastics clear, hair color or ribbon color
Crochet hook (if you have one on hand)
Part a zig-zag (desired width) headband part from ear to ear. French braid headband from one ear to the other, braid down to the ends. Part a second zig-zag head band directly behind the first. French braid the second headband, Braiding down to the ends. At this point you should have two French braids beginning and ending in the same direction. Taking your crochet hook or "parting tool" wrap ribbon around the tool and feed through each beginning point of braids(like starting shoe laces). Every third braid loop lace ribbon through braid crossing ribbon between each lacing. Continue this all the way down to the ends and tie ribbon as desired. This is a fun look kept down to the side or pinned under remaining hair at the nape.
As I always say make it your own, French braid pigtails and weave down the back. French braid two sections on one side of head and weave for a sexy corset look to add to any updo or half updo.

Brush/comb
Gel/moose/hairspray (texture)
Long thin Ribbon of desired color
Rat tail comb/chopstick/pen (parting tool)
Small elastics clear, hair color or ribbon color
Crochet hook (if you have one on hand)
Part a zig-zag (desired width) headband part from ear to ear. French braid headband from one ear to the other, braid down to the ends. Part a second zig-zag head band directly behind the first. French braid the second headband, Braiding down to the ends. At this point you should have two French braids beginning and ending in the same direction. Taking your crochet hook or "parting tool" wrap ribbon around the tool and feed through each beginning point of braids(like starting shoe laces). Every third braid loop lace ribbon through braid crossing ribbon between each lacing. Continue this all the way down to the ends and tie ribbon as desired. This is a fun look kept down to the side or pinned under remaining hair at the nape.
As I always say make it your own, French braid pigtails and weave down the back. French braid two sections on one side of head and weave for a sexy corset look to add to any updo or half updo.
Friday, September 30, 2011
Basket weave looking braid
What you'll need
Small clear or hair colored elastics
Brush/comb
Gel/moose/hairspray (texture)
Bobbypins (optional)
Brush through hair removing all snarls and texture. Split hair into three sections( pigtails, center). Braid each section to the ends. Braid the three braids together into one large intricate and difficult looking braid.
As I always say make it your own, add multiple braids, wrap into a bun, create a floral looking bun by pulling layers out and pinning in place. Add a ribbon for a splash of color.

Monday, September 26, 2011
difficult looking elegant updo
What you will need
Brush/comb
Bobbypins Lg strong and small
Large clip/hair elastic
Small elastic
Gel/Moose/Strong hold hair spray
Smoothing boar brush or comb
Curling iron/curlers
 This is the best pic i could find to describe what I'm trying to explain...
Brush hair and really texture for hold, Divide hair into thirds. Combined top two sections and Clip or tie off for later. With a small elastic tie bottom third into a tight ponytail. It is easier if hair in ponytail is curled however it is not a must. Taking small sections of the ponytail twist curling it around your fingers twist to create a bow like curl and pin take remaining hair from curl and repeat. Take another small section from the ponytail and feed through a pinned curl curl around finger twist and pin, collect the rest of the curl and feed through another curl twist and pin. Continue this with all hair in ponytail. Release all remaining hair section off the head band section into three section and tie out of the way. Part at an angle released hair and pin half out of the way. Slick to the other side above curls insuring it remains smooth and sexy. Secure hair at the other side with Lg bobbypins when secure drape back over the bobbypin and twist and add to the curls. Bring the other section over sleek and smooth. Pin in place at the other side with Lg bobbypin. When secure drape back over the bobbypin and twist and add to curls.
 Release each side individually and slick back and add to curls. Release top and final section and create desired bump pin in place spray to secure hold. Loosely twist hair down to curls and add to curls. Once hair is securely set for a smoother look release the bump bobby pin.

Brush/comb
Bobbypins Lg strong and small
Large clip/hair elastic
Small elastic
Gel/Moose/Strong hold hair spray
Smoothing boar brush or comb
Curling iron/curlers
Brush hair and really texture for hold, Divide hair into thirds. Combined top two sections and Clip or tie off for later. With a small elastic tie bottom third into a tight ponytail. It is easier if hair in ponytail is curled however it is not a must. Taking small sections of the ponytail twist curling it around your fingers twist to create a bow like curl and pin take remaining hair from curl and repeat. Take another small section from the ponytail and feed through a pinned curl curl around finger twist and pin, collect the rest of the curl and feed through another curl twist and pin. Continue this with all hair in ponytail. Release all remaining hair section off the head band section into three section and tie out of the way. Part at an angle released hair and pin half out of the way. Slick to the other side above curls insuring it remains smooth and sexy. Secure hair at the other side with Lg bobbypins when secure drape back over the bobbypin and twist and add to the curls. Bring the other section over sleek and smooth. Pin in place at the other side with Lg bobbypin. When secure drape back over the bobbypin and twist and add to curls.
Christina Aguilera Burlesque updo

What you will need
Hair brush/comb
Gel/moose/hairspray (texture)
bobbypins
small clear or hair color elastic
hair embellishments(optional)


Bring side one up and over your head like a headband and pin in place curling the ends behind your braid. Bring second braid over in front of the first one pinning the braid base to your first sides ends. Bring completely over your head and tuck ends behind and under into first braid and pin in place. Check hair, to insure head band looks fluid. Your can curl the tendrils or leave down as is.
Sunday, September 25, 2011
Hair net
What you will need
Gel/moose/hairspray
Several little hair elastics matching your hair color or whatever color you desire for this look.
Brush,comb
Create a headband part across head from one ear to the next. Pull remaining hair into a pony tail or just out of the way. Taking small little square sections of the head band and tie off tightly with small elastic. Once entire headband section is squared off and tied down starting with the top squares split into two the top two squares. Attach the right half of the first square with the left of the second. Continue this all the way down adding the full square at both ears. Continue again with the next row, starting at the top working your way down and adding the full last square. Continue this until you have only two squares left, if you collected hair into a ponytail wrap the two around and join underneath. If you simply pulled hair out of the way attach the two ends and let the hair you pulled out of the way down. Babies breathe, pearls etc are a fun addition as well as topsy tailing each section. Have fun with this make it yours.

Gel/moose/hairspray
Several little hair elastics matching your hair color or whatever color you desire for this look.
Brush,comb
Create a headband part across head from one ear to the next. Pull remaining hair into a pony tail or just out of the way. Taking small little square sections of the head band and tie off tightly with small elastic. Once entire headband section is squared off and tied down starting with the top squares split into two the top two squares. Attach the right half of the first square with the left of the second. Continue this all the way down adding the full square at both ears. Continue again with the next row, starting at the top working your way down and adding the full last square. Continue this until you have only two squares left, if you collected hair into a ponytail wrap the two around and join underneath. If you simply pulled hair out of the way attach the two ends and let the hair you pulled out of the way down. Babies breathe, pearls etc are a fun addition as well as topsy tailing each section. Have fun with this make it yours.
French fishtail braid
What you will need
Bobby pins
Gel/Moose/Hairspray
Hair elastic
Brush/Comb
Hair decorations(optional)

Bobby pins
Gel/Moose/Hairspray
Hair elastic
Brush/Comb
Hair decorations(optional)
- Choose a section of hair where you want the braid to start. Most fishtail braids begin at the hairline, so choose a central point and divide it into two even sections. Make sure to remove tangles from both sections by combing thoroughly.
- Cross the right section over the left one. Pull the sections away from each other when tightening the braid. Lift a small section of hair from the right section hairline to the middle of the braid by using the end of a rat-tail comb. If you want a more intricate look, pull thinner strands. If you want a more woven appearance, add more strands. Add the new section of hair to the existing right section and cross it over the left section, tightening the braid as you go.
- Use the end of the rat-tail comb again when lifting some strands of hair on the left section and drawing a line from the hairline to the middle section. Even it out with the section you’ve lifted from step 2. Add the lifted hair to the existing left section and cross it over to the right section.
- Repeat steps 2 and 3, continuing to alternate right and left sections. Make sure to tighten each plait as you progress until you reach the hairline at the back of your neck (the nape).
- Secure the remaining hair with a hair elastic or keep the remaining hair hanging free. You can also weave a basic braid to the ends to hold the fishtail braid together. Avoid using office rubber bands when holding the braid as this could damage your hair. You can use bobby pins in securing loose or fly-away hairs.
Beautiful rope french braid
What you will need
Hairspray/Gel/Moose
Brush/Comb
Hair elastic
Bobby pin
1. To start, take a section from the top of the head as if you were going to make a French Braid. Separate this section into three strands of hair. Bring the right strand over the middle and then the left strand over the middle.

Hairspray/Gel/Moose
Brush/Comb
Hair elastic
Bobby pin
1. To start, take a section from the top of the head as if you were going to make a French Braid. Separate this section into three strands of hair. Bring the right strand over the middle and then the left strand over the middle.
2. Hold all 3 strands in your left hand. (Make sure you keep them separate). Gather a small even section from the right side and add it to the right strand.

3. Now you are going to start to wind this strand to the right.

4. Next, change all of the strands over to the right hand while being careful not to mix strands or unravel the twist.
5. Now gather another section from the left side and add it to the left strand.

6. Wind the strand to the right. This is when you may need an extra set of hands.

7. With your left hand bring the wound right strand over to the left. Now, the right twist is now left. The left twist is in the middle and the other strand is on the right ready to have hair added to it.

8. You are going to repeat steps 2 thru 4 until all of the hair is caught in this braid.
 Finish off with a Rope Braid and fasten with an elastic.

Subscribe to:
Posts (Atom)